


Patch Magic
Granite Stone Outdoor Park Bench | Embracing Nature's Elegance | 5 Ft Long | 2 Inch Thickness Seater
Granite Stone Outdoor Park Bench | Embracing Nature's Elegance | 5 Ft Long | 2 Inch Thickness Seater
Discount: Save $699.00
Discount: Save $699.00
You Save: 0%
Custom Measurements
Couldn't load pickup availability
Granite Stone Outdoor Park Bench | Embracing Nature's Elegance | 5 Ft Long | 2 Inch Thickness Seater
Product Description:
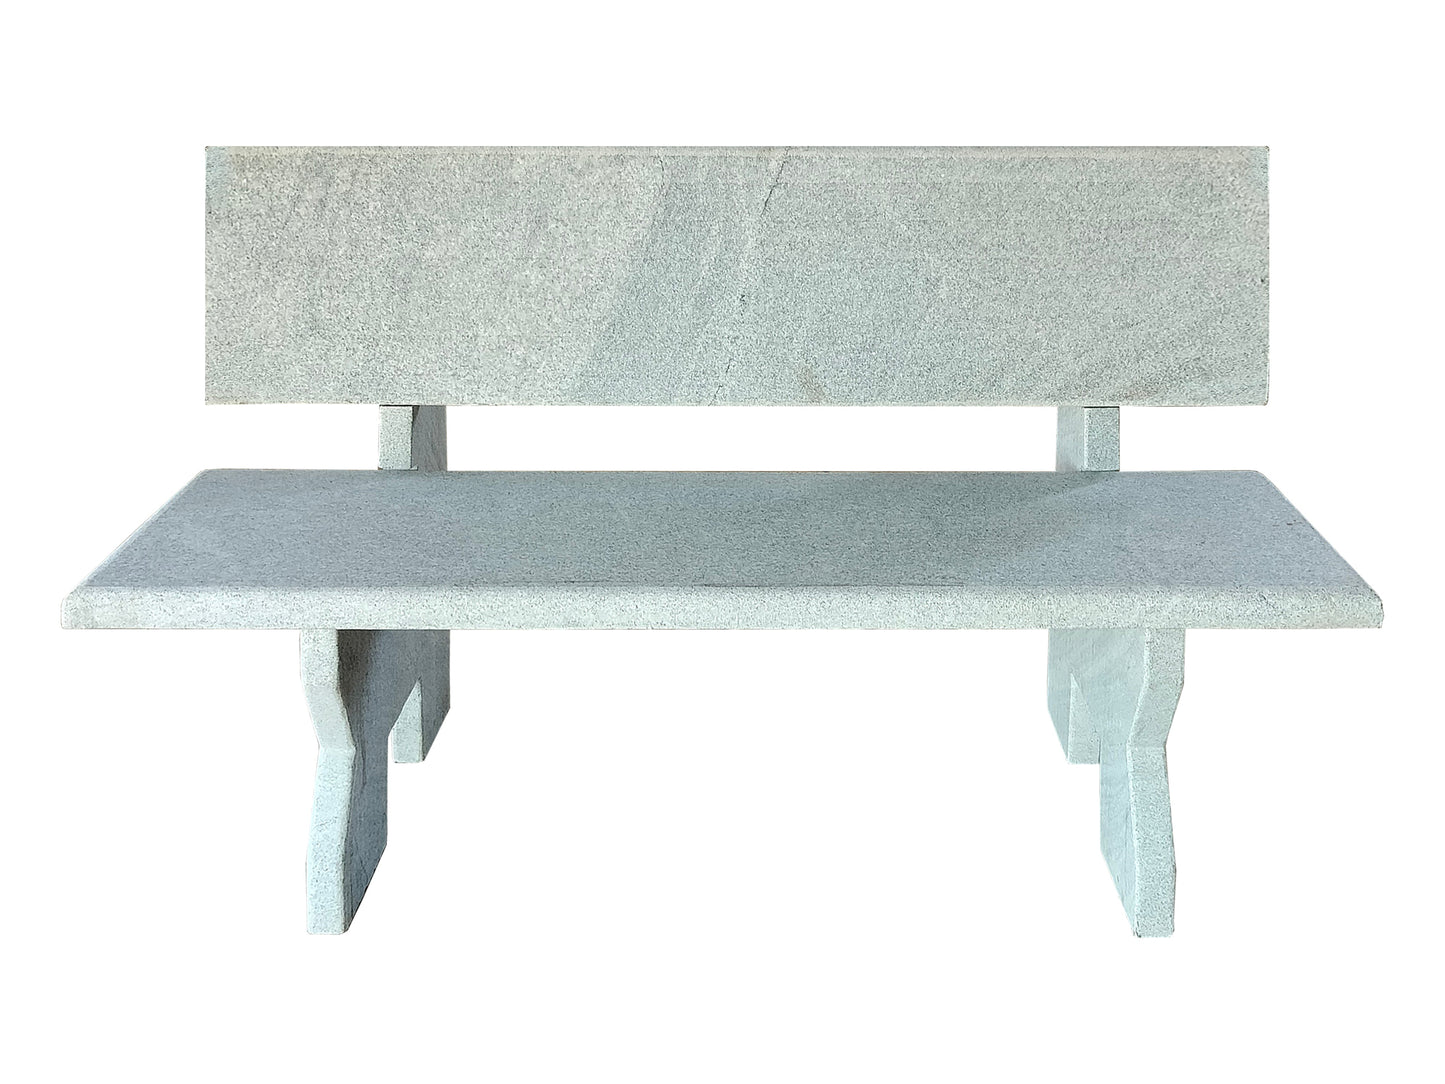
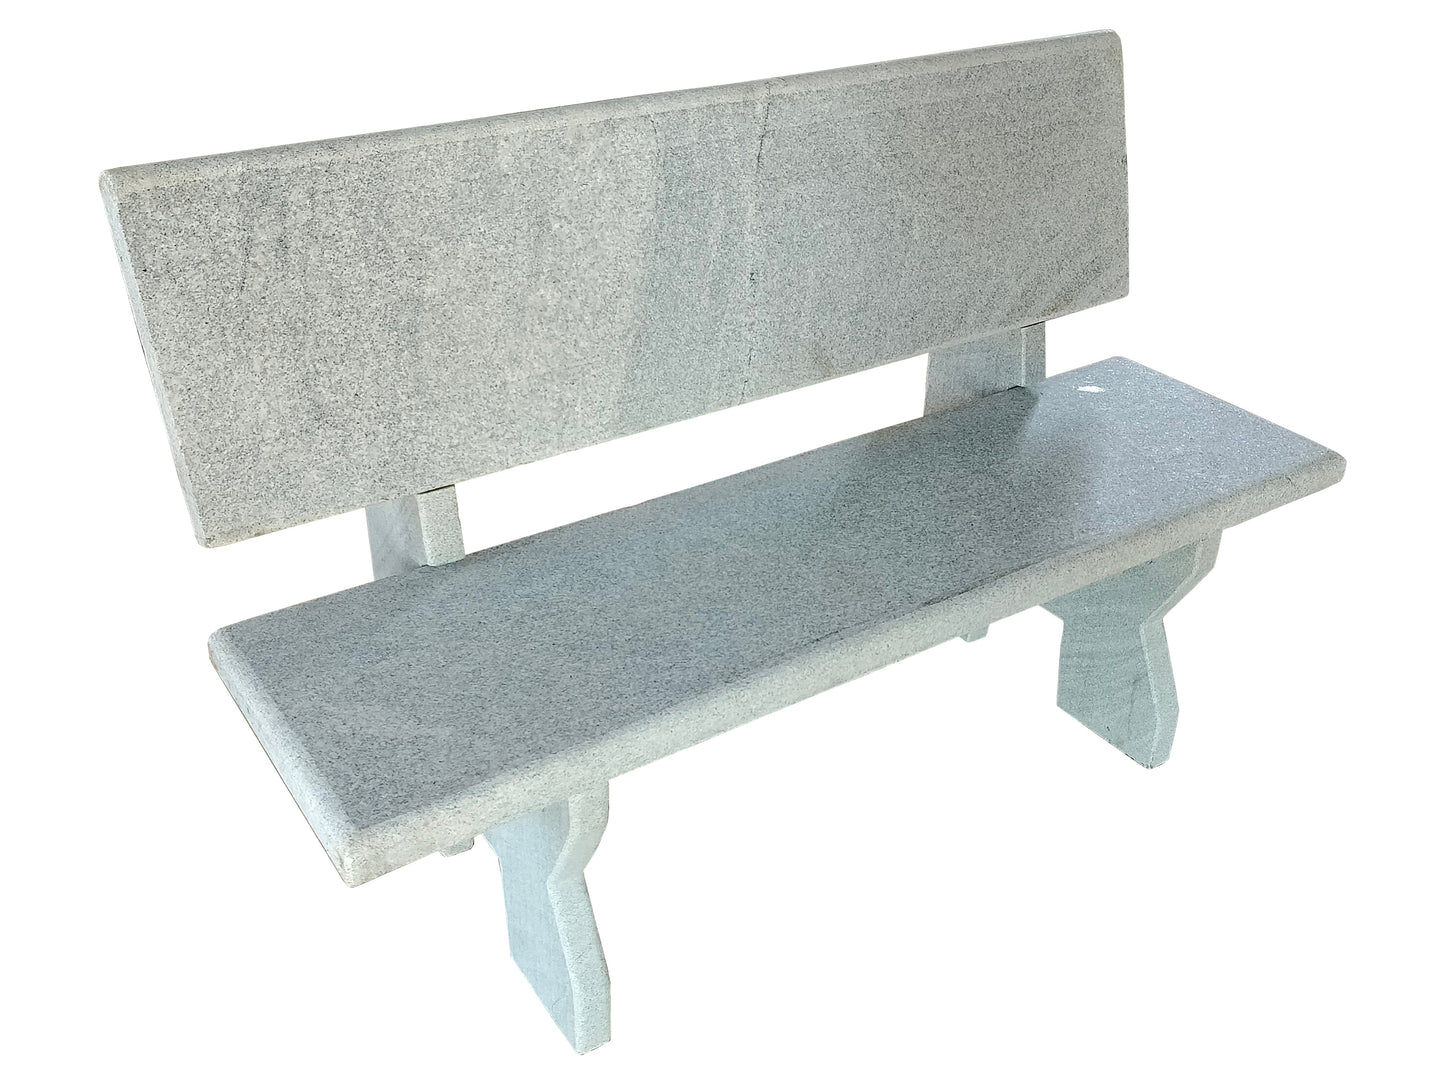
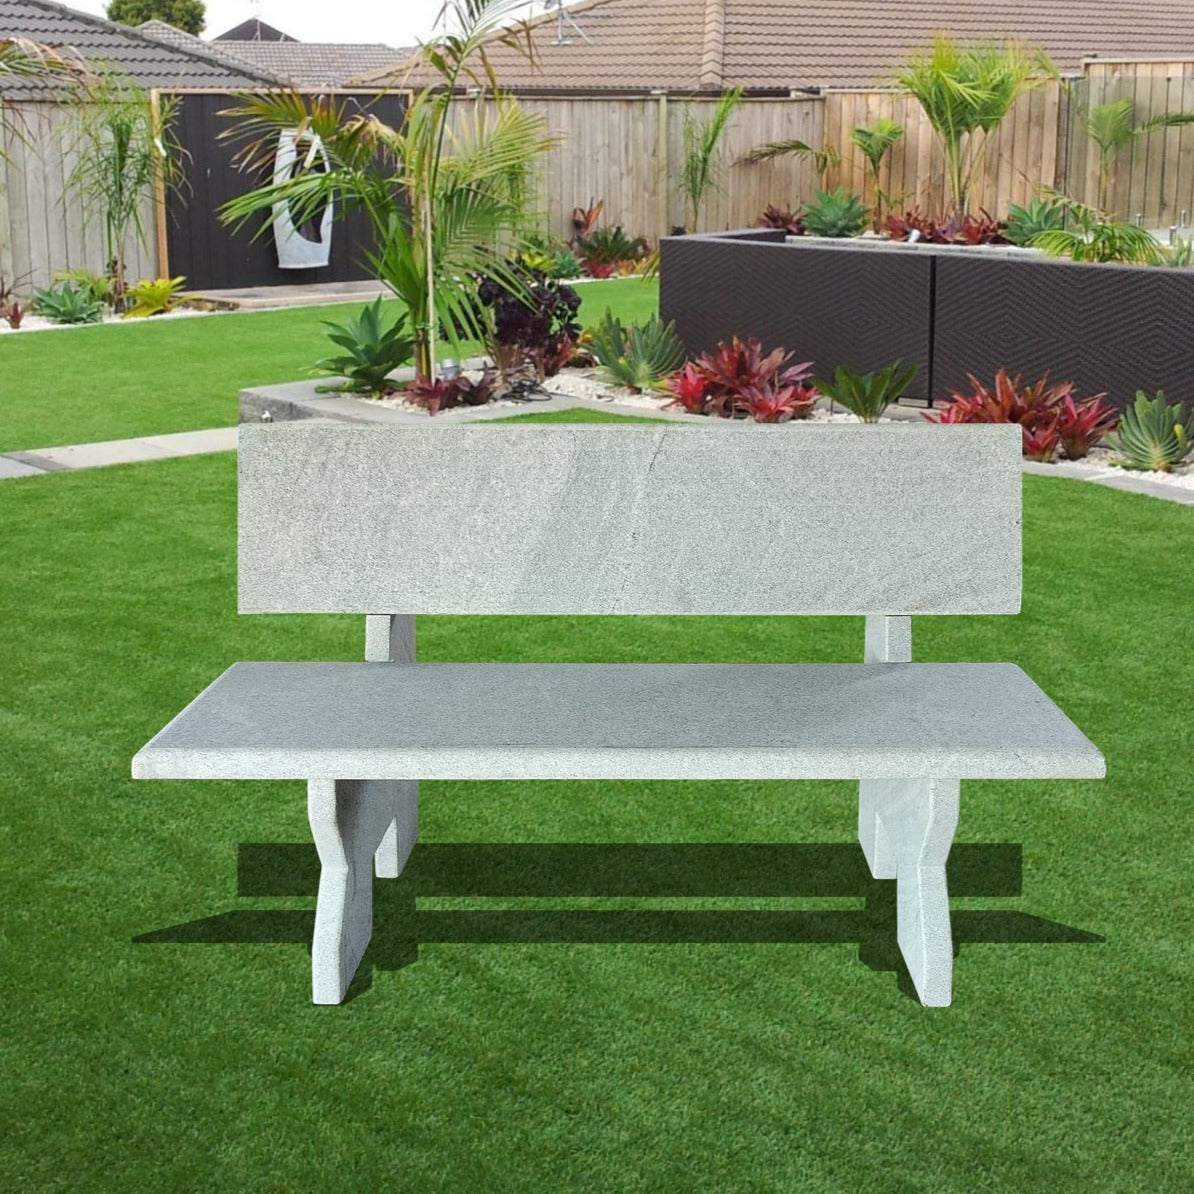
Embrace the timeless elegance of nature with our Granite Stone Outdoor Park Bench. Crafted from durable and beautiful granite stone, this bench brings a touch of sophistication to any outdoor space. Whether it's a serene park, a tranquil garden, or a charming patio, our bench seamlessly blends into its surroundings, creating a serene and inviting atmosphere.
Designed with comfort and durability in mind, the bench features a 5-foot length, providing ample seating space for you and your loved ones. The 2-inch thickness of the seat ensures a sturdy and stable seating experience.
Handcrafted by skilled artisans, each bench boasts a unique pattern and color variation, making it a one-of-a-kind addition to your outdoor area. With its natural resilience to weather and wear, the Granite Stone Outdoor Park Bench requires minimal maintenance, promising years of lasting beauty and functionality.
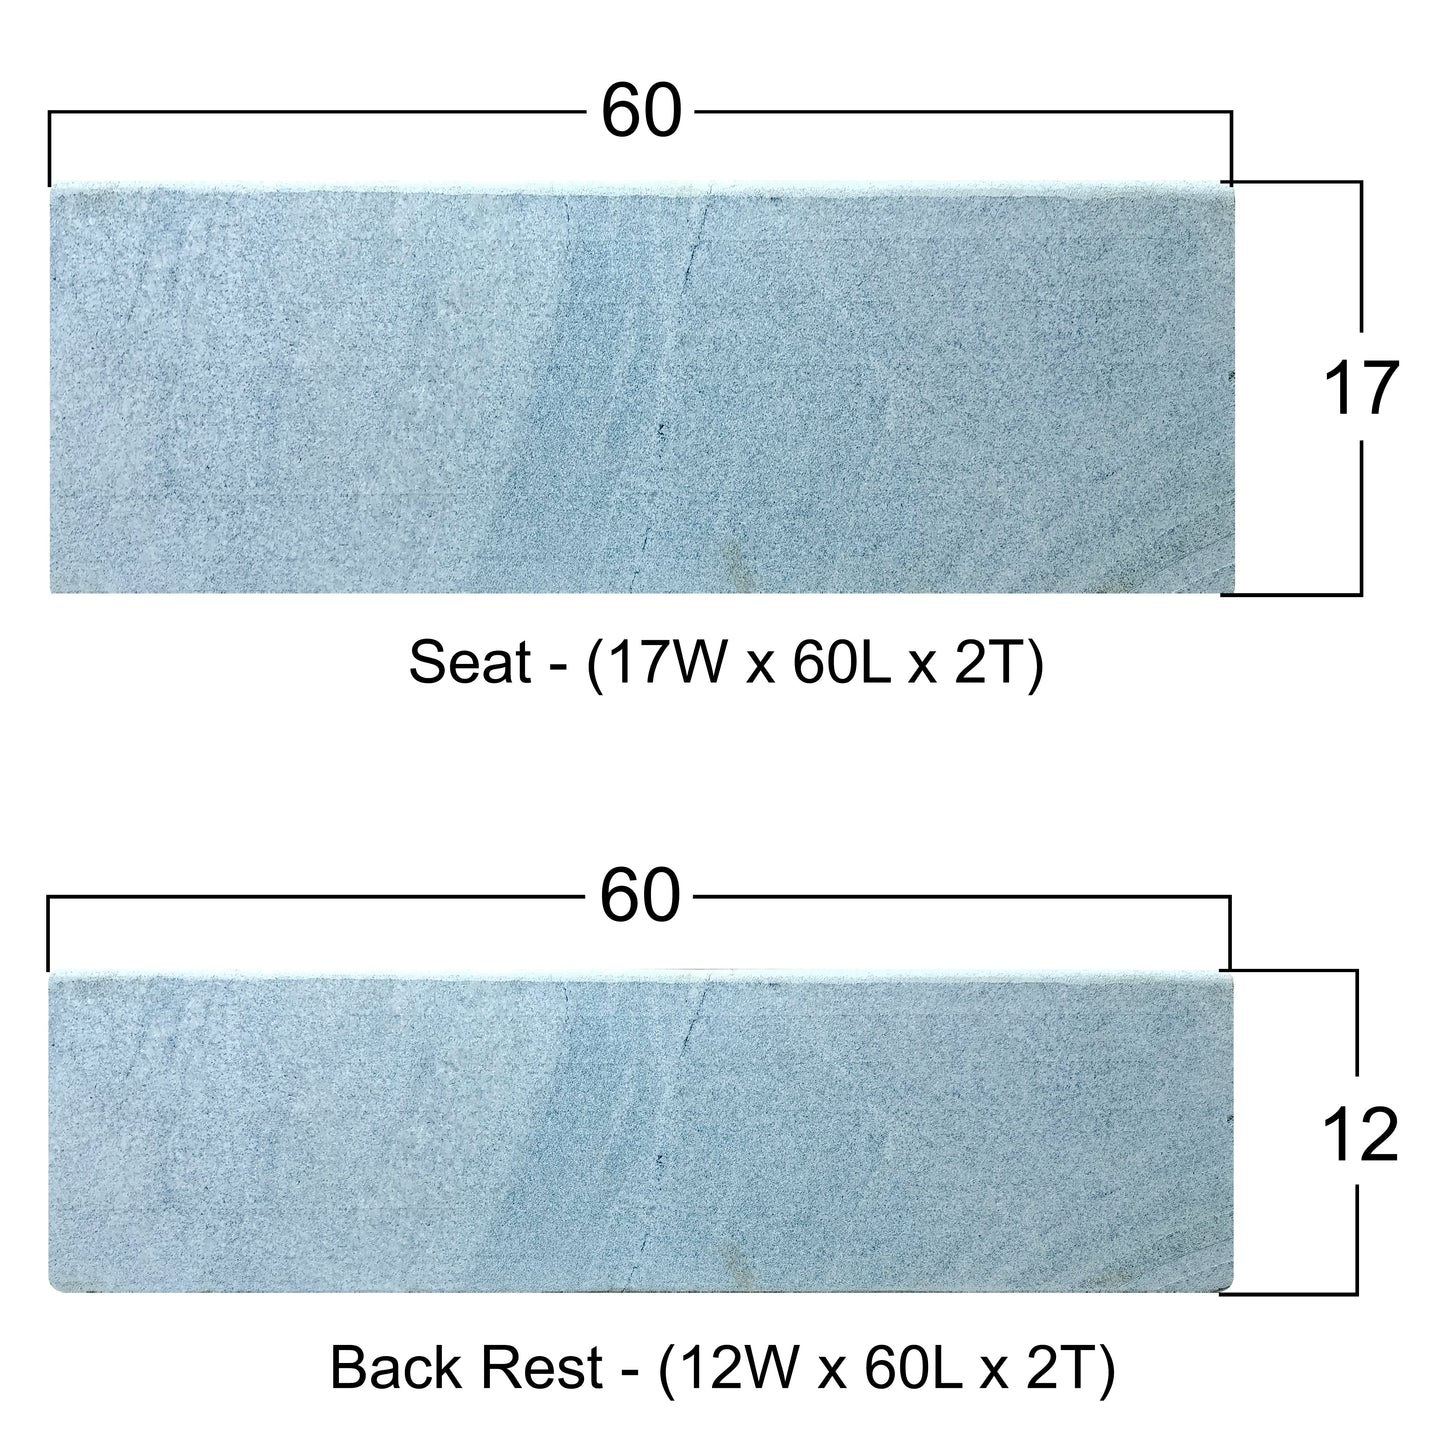
Dimensions:
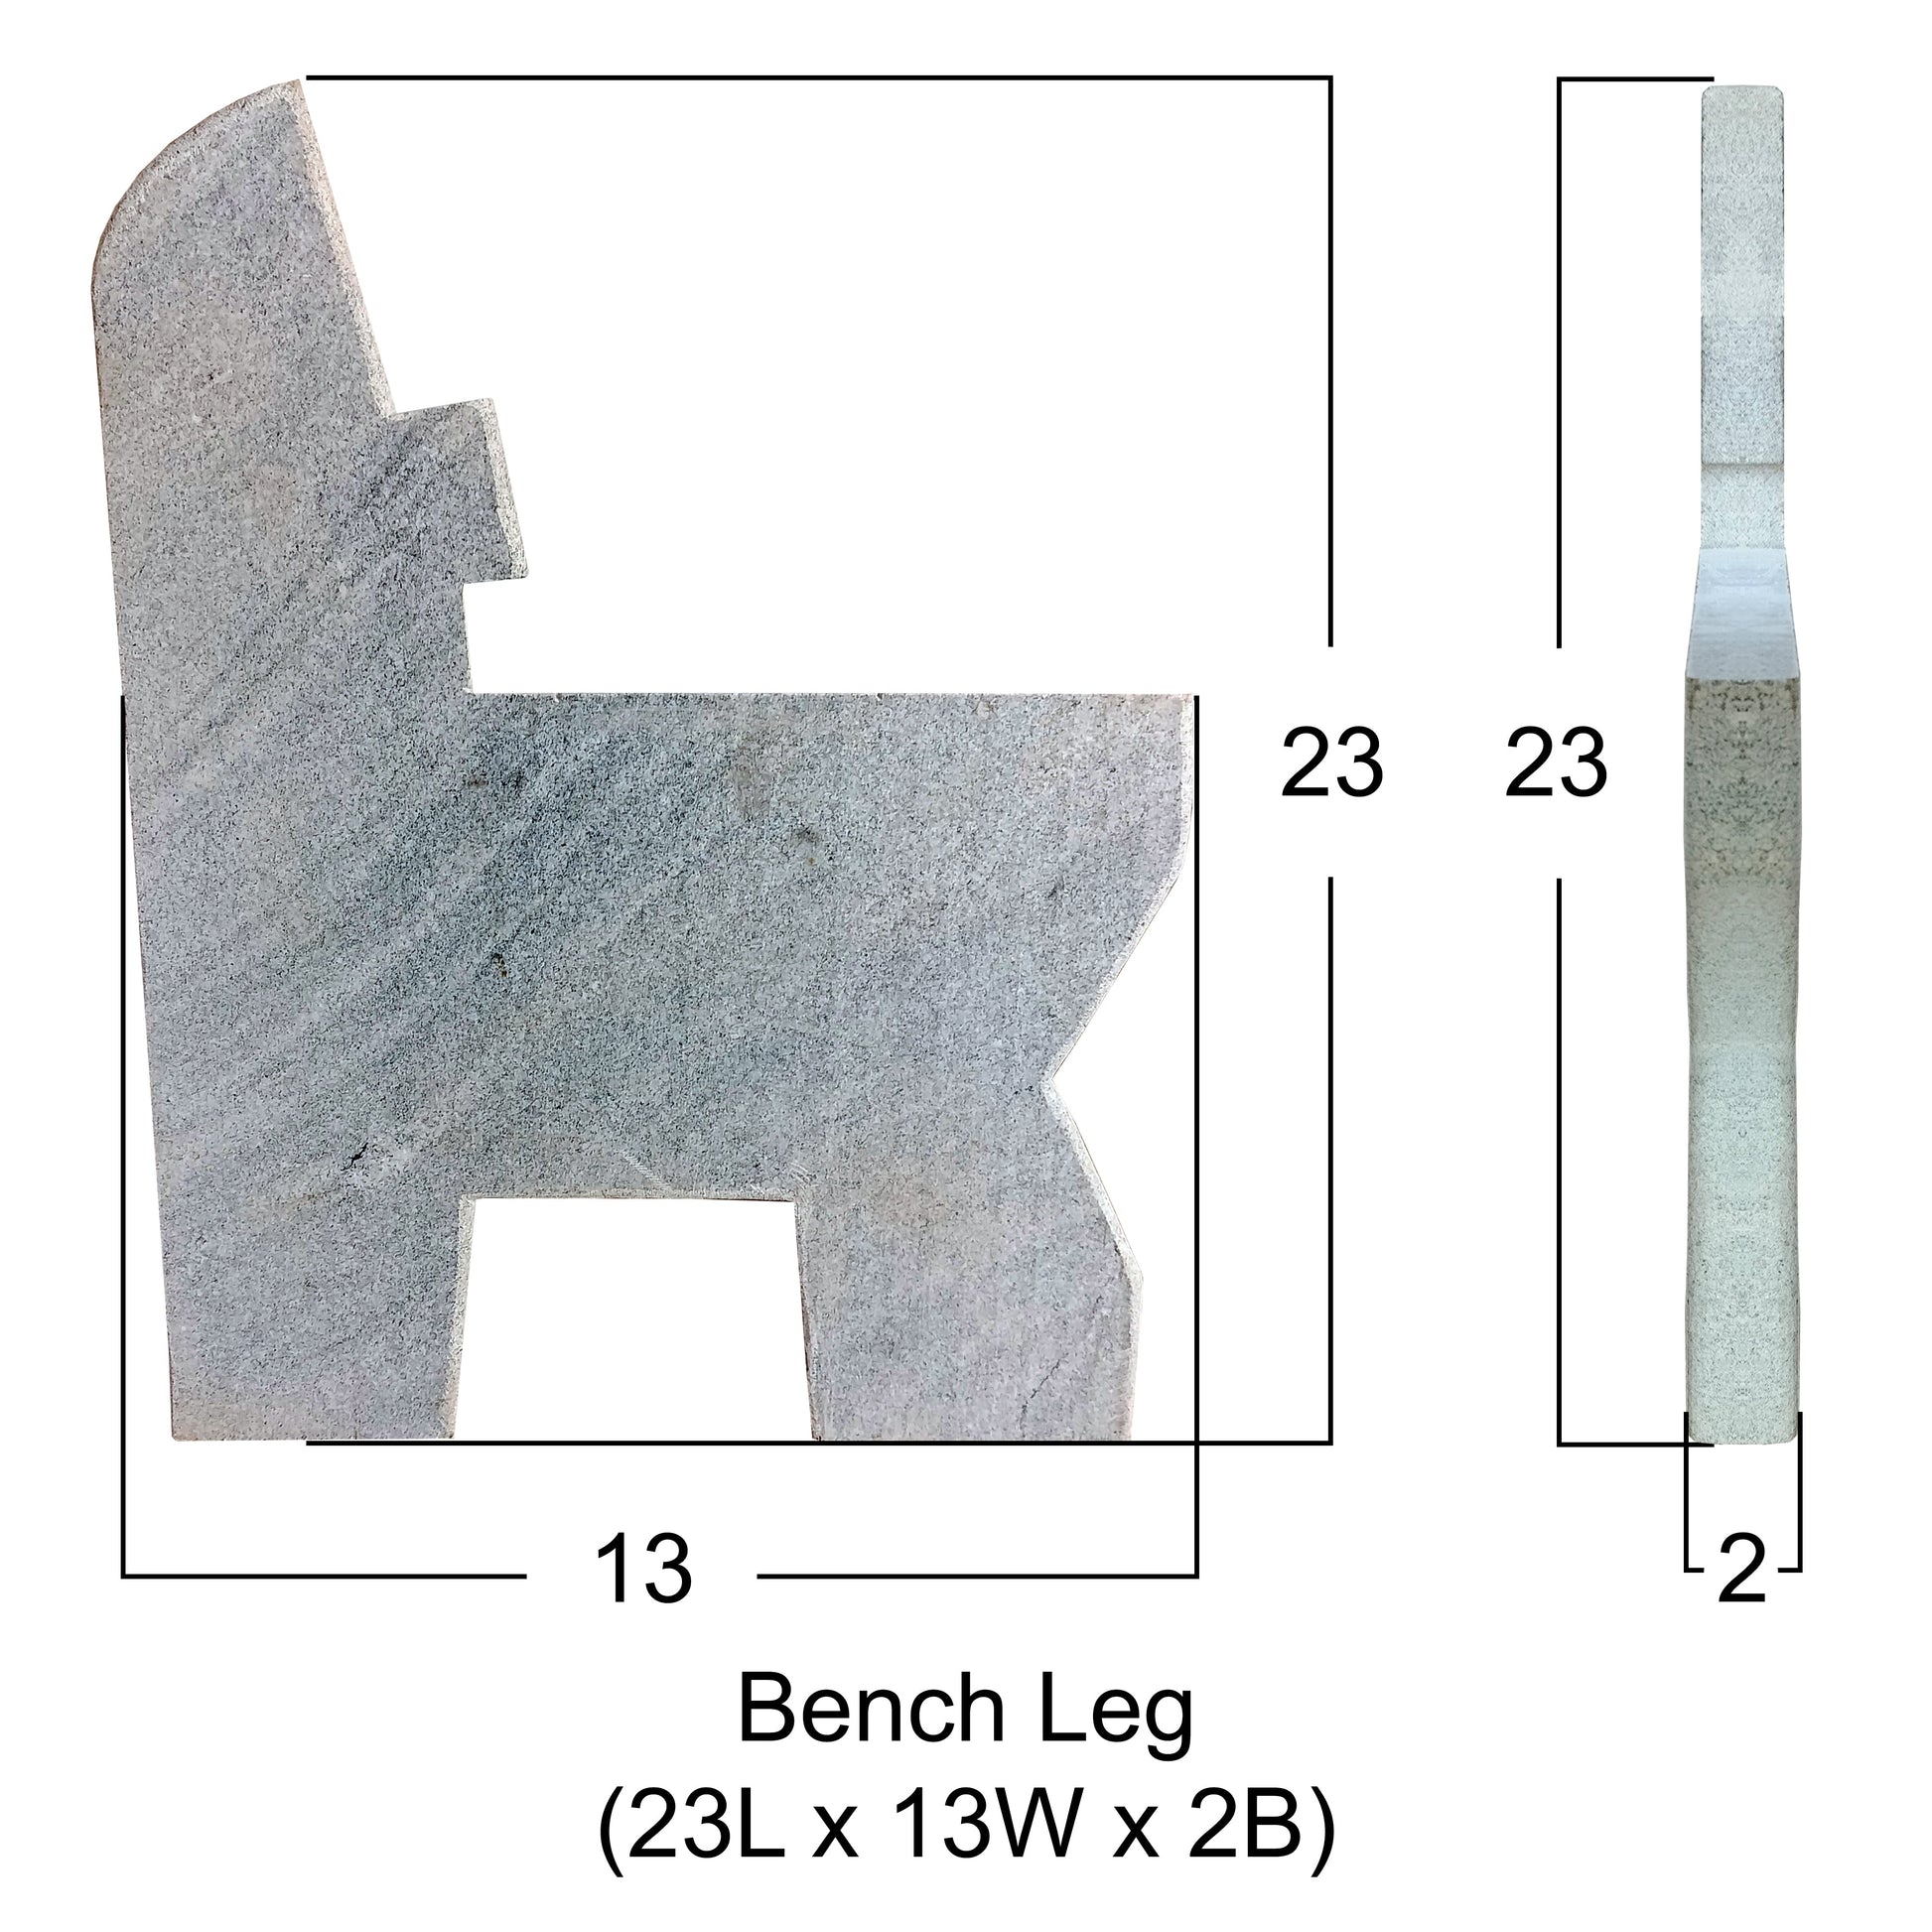
- Length : 5 Ft
- Seat Width : 1.4 Ft
- Backrest Width : 1 Ft
- Thickness : 2 Inch
- Weight : 440 LB
Installation:
The Granite Stone Outdoor Park Bench is designed for easy installation. The bench can be anchored to the ground or a solid surface, ensuring stability and safety.
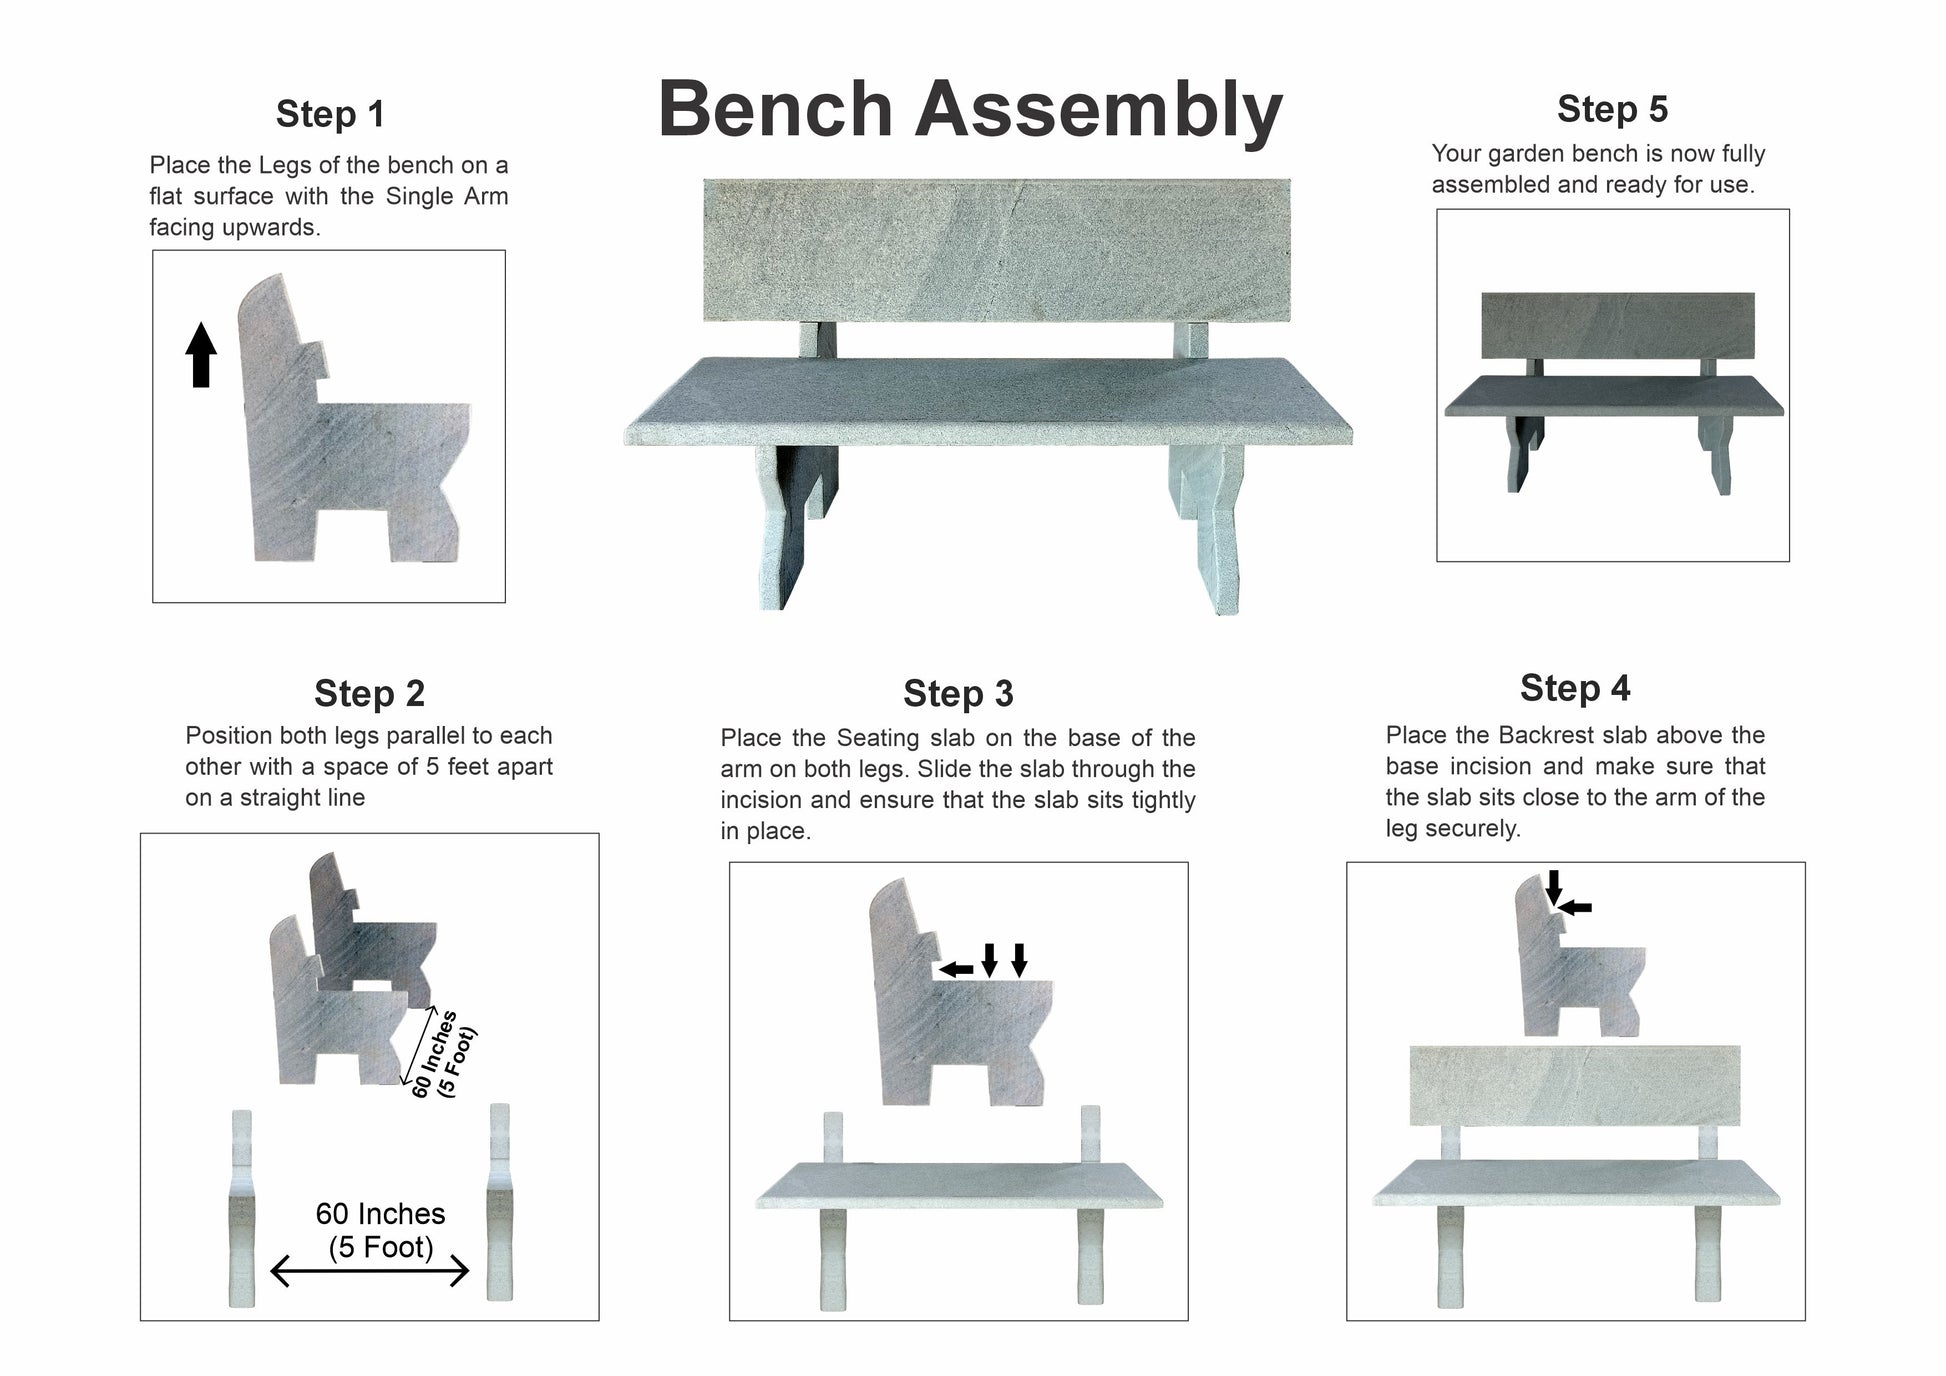
Step 1 - Place the Legs of the bench on a flat surface with the Single Arm facing upwards.
Step 2 - Position both legs parallel to each other with a space of 3 foot apart on a straight line
Step 3 - Place the Seating slab on the base of the arm on both legs. Slide the slab through the incision and ensure that the slab sits tightly in place.
Step 4 - Place the Backrest slab above the base incision and make sure that the slab sits close to the arm of the leg securely.
Step 5 - Your garden bench is now fully assembled and ready for use.
Note :- For step-by-step installation refer to the image.
Maintenance:
To maintain the bench's pristine appearance and durability, occasional cleaning with mild soap and water is recommended. Granite is relatively low maintenance, and its smooth surface discourages the accumulation of dirt and debris.
Use and Application:
The bench is ideal for various outdoor settings, including public parks, botanical gardens, recreational areas, memorial spaces, and private gardens. Its versatile design and sturdy construction make it suitable for both commercial and residential use.
Bonding and Sealing Using Metal Paste (or) White Cement:
Using metal paste or white cement for filling and pasting the benches involves creating a strong adhesive bond to secure the various parts together. Here are the steps to apply either material effectively:
Materials Needed:
- Metal paste adhesive or white cement (choose a product suitable for your benches)
- Clean cloth or rag
- Disposable gloves (for protection)
- Applicator or spatula (if not included with the adhesive)
- Sandpaper (for smoothing, if necessary)
Instructions:
- Preparation:
- Ensure that the surfaces you will be applying the adhesive to are clean, dry, and free from dust, debris, or grease.
- Wear disposable gloves to protect your hands during the application.
- Choosing the Right Adhesive:
- Select a metal paste adhesive or white cement that is appropriate for the type of materials your benches are made of. Ensure that it's designed for strong bonding.
- Application:
- Open the adhesive container following the manufacturer's instructions.
- If an applicator or spatula is provided, use it to scoop out a small amount of adhesive.
- Applying the Adhesive:
- Apply a thin and even layer of adhesive onto the surfaces that need to be joined. If there are gaps or irregularities, you can use a slightly thicker layer to fill them.
- If no applicator is provided, you can use a clean spatula or even a disposable plastic knife to spread the adhesive.
- Joining the Parts:
- Press the parts that need to be joined together. For example, if you're filling gaps in the benches, press the edges together firmly.
- If you're adhering a piece to another surface, like a slab onto a bench, ensure a snug fit and press down to secure the bond.
- Excess Adhesive Removal:
- After joining the parts, any excess adhesive that squeezes out can be wiped away immediately using a clean cloth or rag.
- Curing:
- Follow the manufacturer's recommended curing time. This could range from a few hours to a day, depending on the product. Avoid moving or using the benches during this time to allow the adhesive to fully set.
- Smoothing (if necessary):
- After the adhesive has cured, you can use sandpaper to carefully smooth out any rough or uneven areas, creating a seamless finish.
- Final Inspection:
- Once the adhesive has cured and any smoothing is done, inspect the bond to make sure it's strong and secure.
Please note that specific instructions may vary depending on the brand and type of adhesive you're using, so it's important to read and follow the manufacturer's guidelines provided on the product packaging for the best results.
*Note - Shipping as actuals
Share
Low stock: 4 left
View full details